
DaVinci Resolve 16.1.2 HEVC Main10 Bug
DaVinci Resolve 16.1.2 is here yet HEVC Main10 encodes still see an exponential slow down ever since the format was introduced as an output option in Resolve some versions back.

Test setup:
MacBook Pro 16-inch 2019
2.4GHz 8‑core 9th‑generation Intel Core i9 processor, Turbo Boost up to 5.0GHz
64GB 2.6GHz DDR4
AMD Radeon Pro 5500M 8GB GDDR6 1.2 GHz (Navi 14 - RDNA 1.0)
4.5 TFLOPS Single Precision FP32, 192GB/s bandwidth
8TB SSD
Resolve 15.1.2 Remote Rendering
Davinci Resolve 15 supports remote rendering: the ability to network multiple computers together to distribute the encode processing workload of a video. The new late 2018 Mac Mini takes full advantage of this feature using the fast 10BbE protocol.

Highlight Recovery
The difference enabling Highlight recovery makes when working with RAW in DaVinci Resolve.

Resolve 15.2.1 AMD WX9100
Source: CinemaDNG RAW 3:1 4000x2160p24
Encoding: ProRes 4444 XQ, resulting file size 38GB
AMD 560X: 39m12s (discrete MacBook Pro GPU)
AMD WX9100: 15m46s
2.6X faster! = worth $1500
Curiously, when exporting as ProRes 4444 XQ media info is labelled correctly while using the Rec.2020 colorspace as seen below.

this cannot be said when exporting as H.265 8-bit

I still don’t understand exactly what the ‘Original’ characteristics are, but files that keep these attributes are never read correctly from an LG OLED TV.

Note: all 4GB of VRAM are consumed immediately upon export while only using the built in AMD 560X GPU, appropriate because the WX9100 only shows around a quarter of its 16GB of VRAM being used.
Of note, Handbrake does not utilize the GPU at all, so if you’d didn’t tick the CPU upgrade on your Mac during check out you’re out of luck!

8-bit | 10-bit HEVC Render | Resolve 15
Rendering 8-bit HEVC only uses the GPU, leaving the CPU untapped. Reviewing Activity Monitor while 10-bit is processing reveals a continual handoff between the GPU and CPU. Possible reasons include 10-bit not being fully supported as a hardware accelerated process within the GPU, or simply a snag in the recent master release of DaVinci Resolve 15.


DaVinci Resolve Shortcuts | \ | Split & Join Clips
Splitting in real time like a BOSS
⌘ + \ Split Clip
⌥ + \ Join Clips
Both are available within the Timeline of the Edit Panel. Interestingly these cuts can be made live during playback, meaning if you have ninja like skills you could potentially make all your edits within one viewing. Gangster status.
![DaVinci Resolve Shortcuts | [ ] | Keyframes](https://images.squarespace-cdn.com/content/v1/5317b9ade4b0c6f4c17b3a53/1519623490996-87R1LQ608EO8WFGLVNVA/Keyframes.png)
DaVinci Resolve Shortcuts | [ ] | Keyframes
⌘ + [ to create a Keyframe
⌘ + ] to create a Static Keyframe
⌥ + ] to delete a Keyframe
⌘ + ← move selected keyframe left
⌘ + → move selected keyframes right
All of these shortcuts are available under the 'Mark' menu while in the Color Panel. But then again this post is about saving time by not mousing through menus :P
I promise you adding keyframes by mouse is a pain in the ass in comparison

DaVinci Resolve Shortcuts | ⌥ + P | Add Parallel Node
Adding a Parallel Node and morphing the Parallel Mixer to a Layer Mixer
Since there is no shortcut assigned to P by default in DaVinci Resolve 14, we must resort to the next best thing ⌥ + P which adds a parallel node to your clip while in the Color Panel.
What is a Parallel Node?
'{A Parallel Node} lets you apply two or more overlapping adjustments at a single stage of a node tree.' - pg. 894 DaVinci Resolve Reference Manual.
To better understand this, Blackmagic provides a nice visual explaining how parallel nodes work similarly to additive light theory:

pg. 896 of the Reference Manual
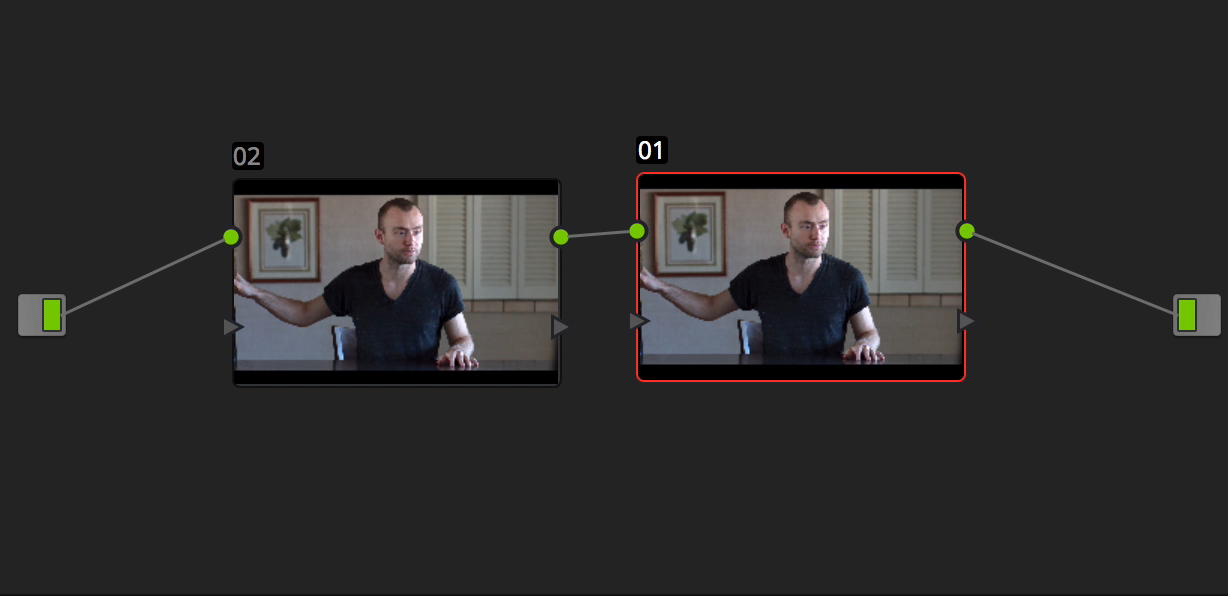
Compare the Parallel Mixer Node Structure to the Layer Mixer Node Structure which as the name implies, layers the nodes instead of mixing them.

Opposite of Adobe Products, the layer farthest to the bottom shows on top of the image

DaVinci Resolve Shortcuts | o | Set Mark Out
Quickly export a portion of the timeline in the Deliver Panel [Shift + 8] by hitting [o] to set the out point and [i] to set the in point. The [i] key is covered more in my previous post here.

DaVinci Resolve Shortcuts | i | Set Mark In

hit that i key
Deceptively simple yet useful to boot. Bring the playhead anywhere on the timeline, smash the i key and BAM! the mark in is set. Ok but what now? well, move the playhead down a bit and slam the O key. Mark out is set. As of writing, I use these keys in the Deliver [Shift + 8] Panel to render only a portion of the timeline.

In/Out Range made easy with i and o keys

DaVinci Resolve Shortcuts | U | Edit Point Type
Edit Point Type [U] is only useful after using Select Nearest Edit Point [V] first.
Hit V and the nearest part of the clip to the playhead will turn green. Now pressing U selects between three point types; the end of the previous clip, the beginning of the following clip, or the meeting between the two. The GIF below illustrates pressing U in succession:

click U after V a couple of times in the timeline
To truly get the most benefit out of Edit Point Type, I'd highly recommend getting comfortable with Trim Edit Mode [T] first. Having the knowledge of both shortcuts will allow for less reliance on mousing, which will in turn be much easier on your hands. And hurting your hand from using the computer too much is simply not a cool story to tell.
Hit up the User/Keyboard Mapping in Preferences when you're ready to assign your own keyboard shortcuts.

DaVinci Resolve Shortcuts | Y | Select Clips Forward on This Track
Pretty straight forward (no pun intended) for the Y key in DaVinci Resolve. Smash it and all clips in front of the playhead get selected. I suppose this comes in handy when you hit the wall and say 'alright we're done here' and delete any clips you may have lingering around in the far corners of your timeline.


DaVinci Resolve Shortcuts | Trim Edit Mode
Trim Edit Mode [ T ]
Part of the Selection Mode [A] and Razor Edit Mode [B] arsenal of Timeline editing tools.
Slip Edit keeps the current clip length but changes its content depending on if there is more unused footage before or after the selection. This feature is especially convenient when editing to a score and need to land on the downbeat in concurrent intervals each time. Simply hover the cursor above the thumbnail preview and drag left or right.
Slide Edit keeps the current clip duration and shorten/extends the clips around it. Very useful when you absolutely love a selection and are willing to let the adjacent clips take one for the team.

Ripple Edit resizes the clip at its edge while pushing and pulling any adjacent clips. This will feel familiar to those coming from the magnetic Timeline of Final Cut Pro X.

Note the lower quality of this GIF created with GIPHY CAPTURE compared to converting a QuickTime X screen recording to GIF in Photoshop like the rest of the examples in this post.
Roll Edit is very straight forward. Place the cursor between two clips and they are both resized accordingly.


Davinci Resolve Shortcuts | Range Selection Mode
Range Selection Mode Symbol
It's time to dive into the uncharted territory that is the Fairlight Panel [Shift + 7] of DaVinci Resolve :0
To be frank, I was a music major in college but I have yet to tackle the amazing audio capabilities that were brought into Resolve after the acquisition of Fairlight by Blackmagic. Never the less, this is the first post concerning the matter so let's dive right in.
R
that's all you have to click to change from the arrow Selection Mode [A] to Range Selection Mode. But don't smash the key too hard, because R only works in the Fairlight Pane as far as I'm concerned.

Selections in the Fairlight Panel are very quick and easy using R seen in the video above. Note that the green bar with dotted handles on top of the timeline designates the selection.
If R doesn't tickle your fancy, be sure to assign Range Selection Mode to any key in Preferences/User/Keyboard Mapping [Command ,]

DaVinci Resolve Shortcuts | Extract Current Node
Ok I'll admit that I haven't been using this one but here goes anyway:
Click E in the Color Pane and you will disconnect a node without deleting it. This will come in handy if you want to make a bunch of looks that can be accessed later without having to rebuild a new node each time, especially if you are a tidy colorist and label each of your nodes like a champ.

When you're ready to take your keyboard shortcuts further, hit Command + ,

DaVinci Resolve Shortcuts | Wipe
The thing about color grading is that the longer you look at your photo the more your eyes will adjust. Meaning, you're going to start thinking that your grade is better than it actually is. To combat this you can take frequent breaks from looking at the screen. You can also use the wipe tool to aid you. This allows you to take any image or snapshot and quickly see it next to your own to compare. Especially handy if you want to imitate the colors of a particular photoshoot you've seen elsewhere.
In the Color Panel:

Wipe [Command + W ] this brings up a side by side comparison of your timeline and the first still grab in your Gallery (which is accessible in the upper left corner of the screen).

Reference Wipe [Option + W] Switches the default Horizontal still grab comparison from left to right. Vertical, Mix, Alpha, Difference and Box are also options located above the main window.

and as always [Command + , ] when it comes time to customize your own shortcuts!

DaVinci Resolve Shortcuts | The most important key
Q

If you have not used the Q key up until now, you're welcome for the time you will soon save.
Switching between Timeline and source media window. Simple enough, but after you start using Q instead mousing between windows you will realize how many wasteful movements you have made until now.
Oh but remember not to hit Command + Q and end up quitting Resolve (at least if you don't have live save enabled that is).
Command + , and get those key commands flowing to your liking!
DaVinci Resolve Shortcuts | Play Rev - Stop - Play Fwd
Almost too easy to over look, the adjacent J, K, L keys work double time as Play Reverse, Stop and Play Forward respectively.
J Play Revers
K Stop
L Fast Forward
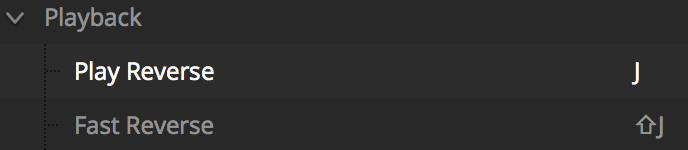


J + Shift Fast Reverse
L + Shift Fast Forward
Command + , Access to keyboard mapping

DaVinci Resolve Shortcuts | Snapping
Magnetic snapping, hit the N key in the timeline
For Final Cut Pro X users, having clips magnetically snap to eachother in the timeline is forced. With Resolve you have the option to turn the feature on/off by simply clicking N.
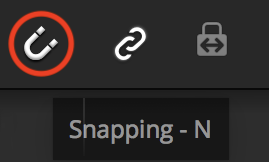
type N for clean edits

DaVinci Resolve Shortcuts | Printer Light Hotkeys
Don't reach for the printer under your desk just yet, Printer Light in this instance refers to the old method of shining gelled light onto film to get a certain tint or white balance.
Command + Option + ` = Printer Light Hotkeys

The shortcut itself does not do anything, but instead engages the number keys to control the Offset part of the Primaries Wheels.
+ Red 7 - Red 4
+ Green 8 - Green 5
+ Blue 9 - Blue 6
+ Cyan 1 - Cyan -
+ Magenta 2 - Magenta 0
+ Master + - Master Enter (only works on num pad)
Using the number pad of a full size keyboard makes more logical sense than the number row on top of your laptop keyboard because the adjustments are made in + or - color pairs such as +7 and -4 to adjust the Red tint up and down. The number row keys still work as Printer Light Hotkeys as well mind you, just takes a little more time remember what key does what.

Available as a keyboard cover from kbcovers.com
I highly recommend a dedicated coloring interface like the DaVinci Resolve Micro Panel for a satisfying coloring experience (it does exist). But if you're on the plane or in the coffee shop with your laptop these shortcuts are very much prized time savers.
Finally, don't forget to disengage Printer Light Hotkeys (Cmd+Opt+`) to get your keyboard back to normal!